
Table of Contents
- Introduction
- What You'll Need
- Step 1: Create or Open a Google Form
- Step 2: Add Your Questions
- Step 3: Understand the Types of Questions that Support Logic Branching
- Step 4: Setting up Logic Branching
- Example:
- Step 5: Create Sections for Each Path
- Step 6: Link Sections to Answers
- Step 7: Test Your Form
- Step 8: Distribute Your Form
- Conclusion
Do not index
Introduction
Google Forms is an incredibly versatile tool that makes collecting information from a group of people seamless. However, not every question is relevant for every respondent, and this is where logic branching comes in. Also known as "conditional logic" or "branch logic," this feature allows you to guide respondents through different paths based on their previous answers. This makes for a more streamlined experience for respondents and allows you to gather more targeted data.
In this blog post, we'll go through a step-by-step guide to help you understand how to implement logic branching in your Google Forms.
What You'll Need
- A Google Account
- A Google Form you want to add logic to (either a new form or an existing one)
Step 1: Create or Open a Google Form
First, navigate to the Google Forms website and sign in if you haven't already. You can either start a new form by clicking the
+ Blank option or open an existing form where you'd like to add logic branching.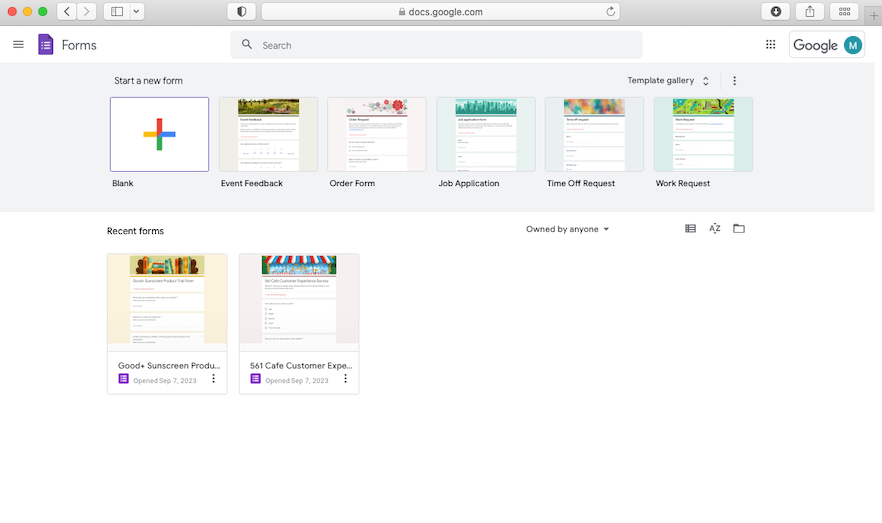
Step 2: Add Your Questions
Before setting up logic branching, you'll need to have the questions already added to your form. Add questions by using the
+ icon on the right-hand side of your form. Google Forms supports various types of questions like multiple-choice, checkboxes, short answers, etc. Make sure to add all the questions you'll want for all potential paths a respondent could take.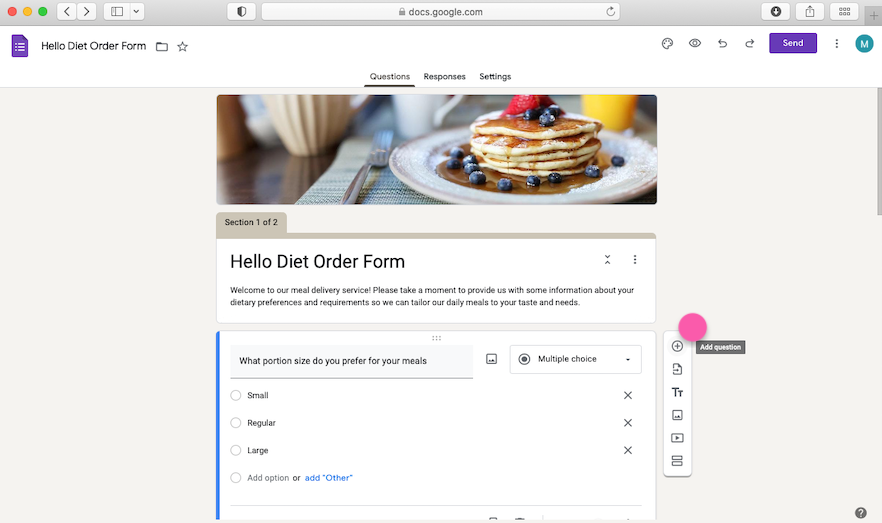
Step 3: Understand the Types of Questions that Support Logic Branching
Not all question types support logic branching. The types that do include:
- Multiple Choice
- Dropdown
- Checkboxes
Step 4: Setting up Logic Branching
- Click on the question you want to set logic for.
- Click on the three-dot icon (More options) at the bottom-right of the question box.
- Select ‘Go to section based on answer.’
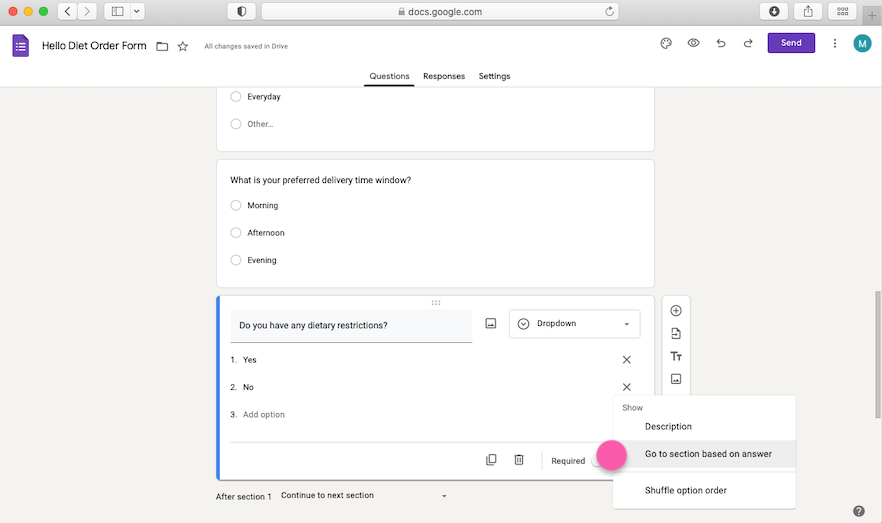
Once you enable this, dropdown menus will appear next to each answer option for your question. These dropdowns will list all the sections you have in your form.
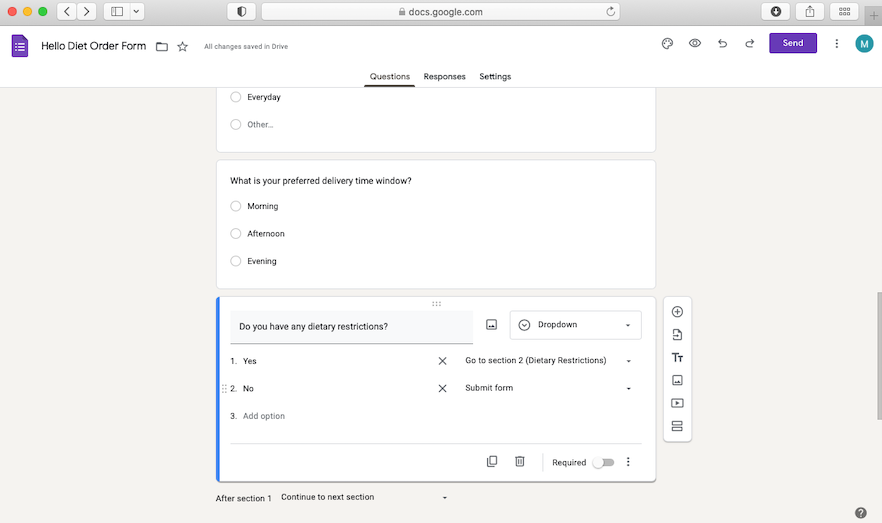
Example:
If you have a question like: "Do you have any dietary restrictions?"
- Yes
- No
You can set it so that if the answer is "Yes," the respondent is directed to a section that asks about the specific dietary restrictions they have. If they select "No," they could skip that section altogether.
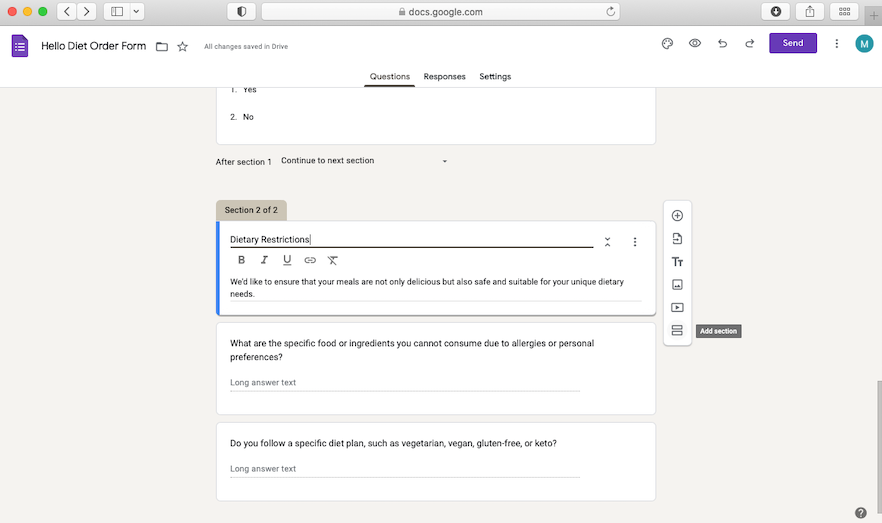
Step 5: Create Sections for Each Path
- To create a new section, click on the
Add sectionicon (it looks like two rectangles stacked) on the right-hand sidebar.
- Give your new section a name that indicates its purpose.
- Add questions that are relevant to this particular section.
Repeat the above steps to create all the sections you'll need for your different paths.
Step 6: Link Sections to Answers
Go back to your original question and use the dropdown menus next to each answer to link to the appropriate sections you've just created.
Step 7: Test Your Form
Always test your form thoroughly to make sure the logic branching works as intended. You can preview your form by clicking the eye icon at the top of your screen.

Step 8: Distribute Your Form
Once you've confirmed that everything is working as it should, go ahead and distribute your form by clicking the "Send" button at the top-right corner of the screen.

Conclusion
Logic branching can significantly enhance the utility and user experience of your Google Form. It's a simple yet effective way to make your forms more dynamic, interactive, and focused. Happy form building!

Written by
Dominic is the co-founder of Fillout.com. He previously worked on engineering & product at Retool. Prior to Retool, he started Cheer ( acquired by Retool in 2020).